
socket.io
아래 코드에서 사용될 메소드와 이벤트 등에 대한 설명은 이전 포스팅_"[Node.js] socket.io로 실시간 채팅 구현하기(1)" 을 참고하면 된다.
🧁 프로젝트 목표
- 채팅방을 생성할 수 있고, 해당 채팅방에 들어온 클라이언트 끼리 메세지 전송이 가능하다. (다른 채팅방의 메세지는 볼 수 없다.)
- 실시간으로 메세지를 주고 받을 수 있다.
- 실시간으로 이미지를 주고 받을 수 있다.
🍹 프로젝트 결과
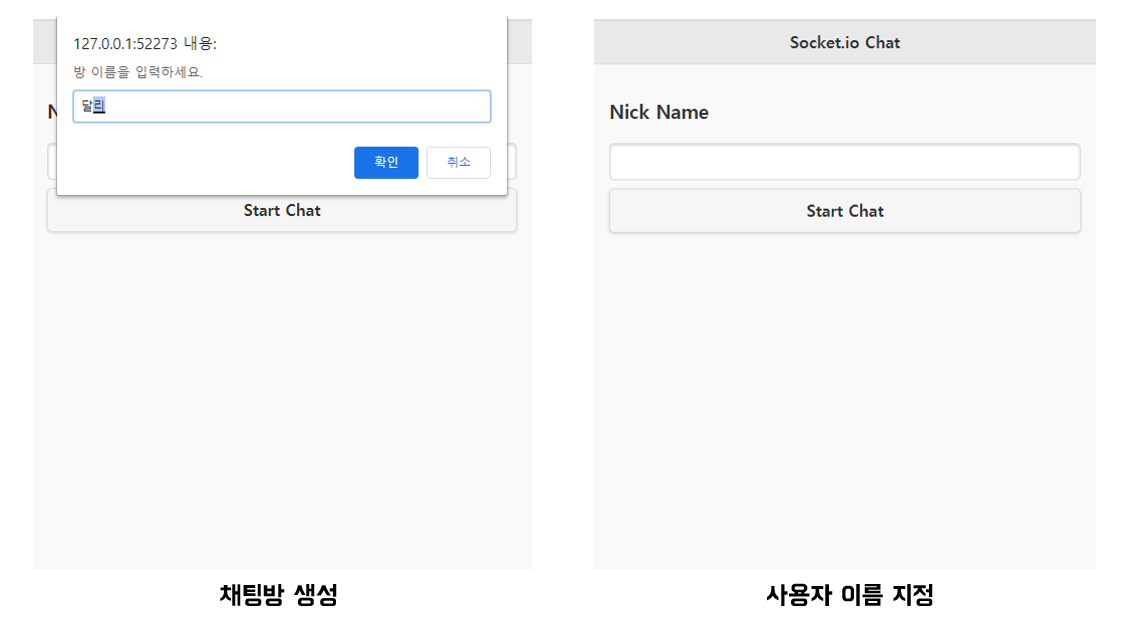


🍰 프로젝트 경로 구성

- HTMPpage.html은 프론트를 위한 파일이다.
- express를 따로 파지 않고 app.js내에서 웹서버를 직접 생성했다.
- config폴더는 s3와 multer사용을 위한 폴더이다.
- 실행은 node app.js명령어를 통해서 했다.
🍩 SERVER(node.js)
1. 필요한 모듈 선언
var http = require('http');
var fs = require('fs');
var socketio = require('socket.io');
var express = require('express');
var app = express();
const upload = require('./config/multer');
// upload는 s3를 통한 이미지 저장을 위해 선언한 것이며, 이에 대한 설명은 생략한다.
upload는 s3를 통한 이미지 저장을 위해 선언한 것이며, 이에 대한 설명은 생략한다.
2. 웹서버 생성하기
var server = http.createServer(app);
app.get('/', (request, response) => {
  fs.readFile('HTMLPage.html', (error, data) => {
    response.writeHead(200, { 'Content-Type': 'text/html' });
    response.end(data);
  });
})
server.listen(3000, () => {
  console.log('Server Running at http://127.0.0.1:3000');
});- http.createServer로 웹서버를 생성한다. (http를 설치하고 var http = require('http'); 로 모듈을 선언해야 한다.
- get으로 해당 주소에 접속했을때 HTMLpage.html파일로 연결한다.
- 콘솔창에 서버 주소를 띄워준다.
3. socket 정의, 설정
var io = socketio.listen(server);
io.sockets.on('connection', (socket) => {
  // message
  var roomName = null;
  socket.on('join', (data) => {
    roomName = data;
    socket.join(data);
  })
  socket.on('message', (data) => {
    io.sockets.in(roomName).emit('message', data);
    console.log(data);
  });
  socket.on('image', (data)=>{
    io.sockets.in(roomName).emit('image', data);
    console.log(data);
  })
});- join : 채팅방에 대한 이벤트
- message : 기본 메세지 전송에 대한 이벤트
- image : 이미지 전송에 대한 이벤트
4. 사진 전송시 s3에 등록하기
app.post('/image', upload.single("image"), function(req, res, next) {
  try {
    console.log(req.file)
    var data = req.file;
    res.send(data.location);
  } catch (error) {
    console.error(error);
    next(error);
  }
});
🍮 클라이언트
1. 이벤트 발생시키기
버튼을 눌렀을 때, 특정 이벤트를 발생시킬때, 아래와 같이 clink function안에 원하는 이벤트의 emit을 넣어주면 된다.
$('#button').click(function () {
    socket.emit('message', {
        name: $('#name').val(),
        message: $('#message').val(),
        date: new Date().toUTCString()
    });
});
2. 이벤트가 발생했을때 설정
socket.on('message', function (data) {
        var output = '';
        output += '<li>';
        output += '    <h3>' + data.name + '</h3>';
        output += '    <p>' + data.message + '</p>';
        output += '    <p>' + data.date + '</p>';
        output += '</li>';
        // 객체 추가
        $(output).prependTo('#content');
        $('#content').listview('refresh');
 });
🍟 참고
📛 config/multer 에러, 이미지 multer 사용에 어려움이 있으신 분들은 이미지 업로드 관련 포스팅을 참고해 주세요!
반응형
'node.js' 카테고리의 다른 글
| [Sequelize] findAll한 데이터에서 dataValues 이외의 정보 버리기 (0) | 2021.03.31 |
|---|---|
| [Node.js] 애플로그인 구현하기 (1) | 2021.03.30 |
| [node.js] multer와 S3를 이용한 이미지 업로드 (multer 설치 부터 S3이미지 업로드 까지) - 2. S3 (0) | 2021.03.30 |
| [node.js] multer와 S3를 이용한 이미지 업로드 (multer 설치 부터 S3이미지 업로드 까지) - 1. multer (0) | 2021.03.30 |
| [Node.js] socket.io로 실시간 채팅 구현하기 (1) (0) | 2021.03.30 |

